Get started with Power Apps: A tutorial to Building Business Critical Apps the Right Way
Start working with Copilot
Add some extra columns like "Start date" & End date
Now that you have completed your table, you just have to click the Create App button.
it will take some minutes to make a fully responsive single-page app based on a created table
I want to allow a user to make multiple for a single-line
1(Expense) = * (Line Items)
we have to create another table from the line item.
Now you get multiple options to create a table like an Excel file, manually or with copilot I am going with the Start with a blank table.You can see my table schema just for reference
Now you can see the table in the Data column.
Now you have to make a Relation between the Line item & Expense table. You have to come on the child table like Line Item.
Click on relationship and select new relation from the Action pane or choose Cardinality of the table.
choose the parent table
write a filed name on which table relation base
There is a relationship behavior option in the advanced option where you can select the table behavior in my case I am going with Parental Behavior.
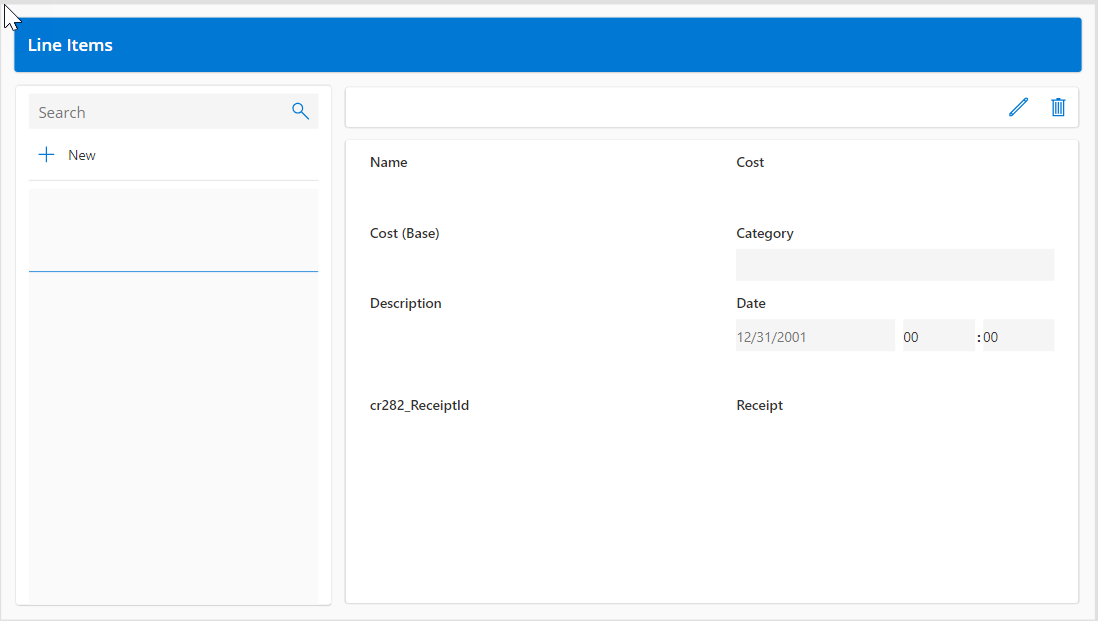
Now we have to create another screen for Line Items. You just have to create a new screen by clicking on the New Screen button on the Screen Tab.
choose a Black screen but with Data and Select your Table (Line Items).
Add you will get the screen same as the previous screen.
Line Items will be created for expenses. We will add a line item button on our main screen Action pane
OnSelect = Navigate('Line Item Screen')
Now we have to concatenate the expense name on the line item screen header
Text = DataSourceInfo('Line Items', DataSourceInfo.DisplayName) & " " & 'RecordsGallery1'.Selected.'Expense ID'
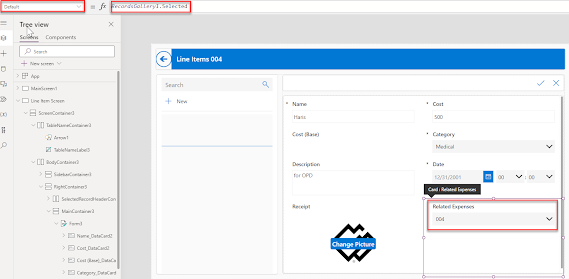
For the Related Expense field on the Line Item Form, we have to set the Default value of the type of expense
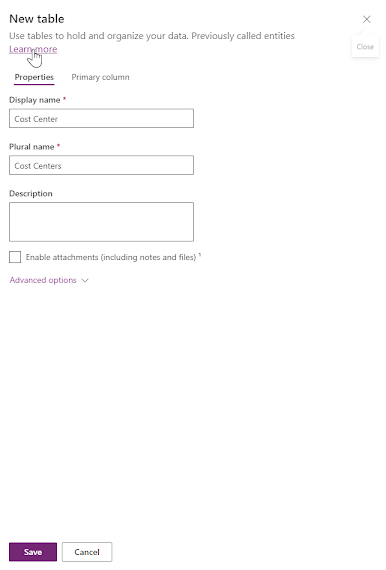
Now whenever the expense is submitted it should begin an approval process. When the expense is created it should be associated with the cost center. Now we have to create a Table that contains the Cost center data Step as the same as the previous table we created.
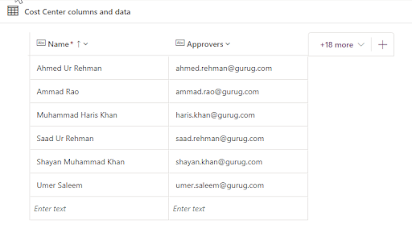
Add some data to the tableAdd a field in the Expense Table like Cost center related.
Now we have to add a lookup field in the main screen form


Comments
Post a Comment