Employee Travel Request Power App
First of all, you have to log in with your school or business Account at make.powerapps.com
When you log into an environment you see the below screen
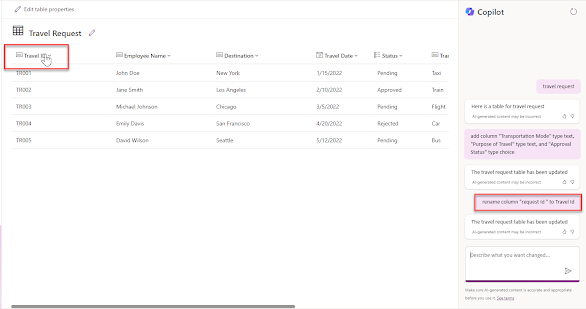
Create a dummy table and data for the App through Copilot
Copilot works as Google Assistant and Siri. There is a chat option in Copilot where you write your query. in my case, I want a travel request table with some Dummy data. If you want another field or extra field you just have to say it to Copilot
You can also rename and delete column
you can also add more rows and clear data easily with a command.
if you want to create a table you just have to simply click on Create button.
Build a Modern Power App
Click on Start with a page design
There is an already designed app Templates
Gallery connects to table, Black Canvas, Sidebar, Header main section footer, etc
you can see in the below screen shot
In our case, we are going with the Header, main section footer Template
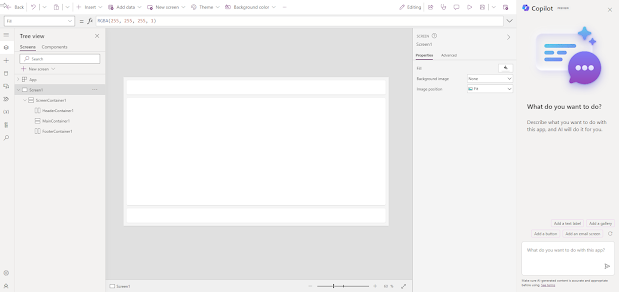
Now you can see the Canvas studio experience
Create App Header
Click on the Header container Plus icon ( + ), and search for the header in the Modern Tab section
After adding the Header portion you have to add the logo of the app. You can add a logo by clicking on the below option.
Now you have to add a table or Datasource to the app
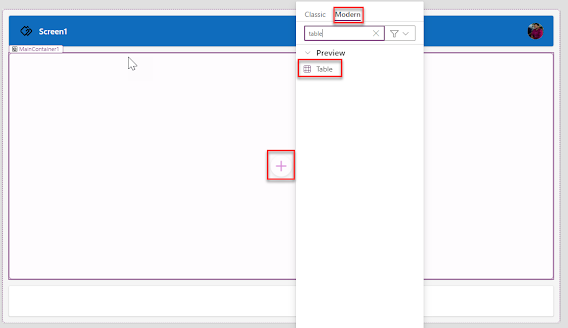
Click on the Main container Plus icon ( + ), and search for the Table object in the Modern Tab section
We already created a table in the dataverse with the name Travel Request. Add Travel Request Table as an App Datasource.
Now you can see the data of your table in your App screen
To see data on the full width of the app
Option: Align in container = stretch
To see data on the full height of the body container
Option: Flexible Height = Yes
Initially, the App shows a couple of fields. You can add or remove fields through the field edit option
Now we have to add 2 buttons new & edit
We just have to click on the + Button and select the Button object from the Modern Tab
also, you can change the Button Text & Alignment of the Button.
Create a New Screen or Page form the New & Edit button.
After creating a new screen Header should be the same as per the previous screen
on MainContainer add From from the list of objects.
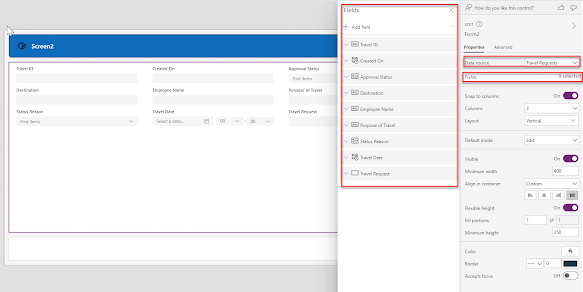
The Datasource for this form will be the same as the previous page
After Connecting with DB add fields into the form that are required to show on the form
You can also have the ability to change the property of field like Mandatory
You have also the ability to re-order fields by just drag and drop
To save data for new and edit requests but the formula on the submit button on Form2Now we have to add New and Edit button functionality.
New Button
Edit Button
Get the selected record on the edit form page.
Remove white space from the App on the preview of different screen layouts
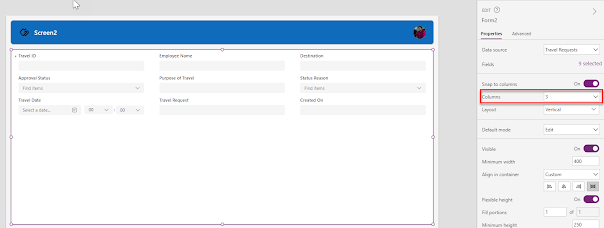
There is a Column property in the form to set the no of fields in the column
When you see your app in the mobile preview you can get the alignment issue from the right side
as you can see in the below screenshot.
you can adjust it with LayoutMinWidth = Parent.LayoutMinWidth
The edit button is visible and disabled when the record is selected from the grid
Default value on any control of form.
Default = IF(FormMode = FormMode.New, User().FullName, ThisItem.'Employee Name')
make field noneditable
DisplayMode = DisplayMode.View












Comments
Post a Comment